Skip to content
  • Front Page
  • Mandala
  • Kami
  • Downloads
  • Support
  • Privacy Policy

Mandala

11
  • Installation Guide
  • Mandala – Clean uninstall procedure
  • Getting Started
  • User Interface
  • Diffusion
  • Img2img
  • ControlNet
  • TextureGen
  • Depth2Img
  • Panorama
  • Settings

Kami

1
  • Kami
  • Home
  • Docs
  • Mandala
  • ControlNet
View Categories

ControlNet

3 min read

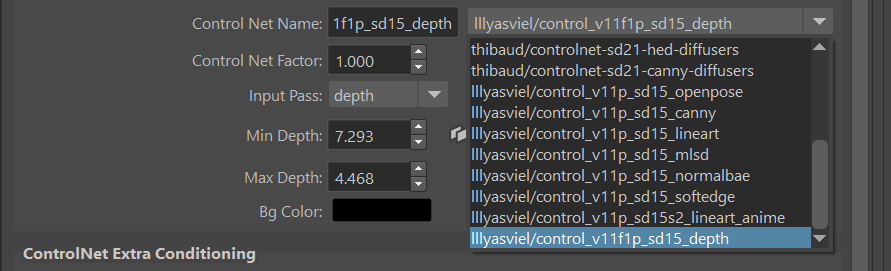
Generates an image based on a prompt, and a variety of passes. Up to two controlNet inputs are supported at the same time via the extraControlNet attributes.

Example #

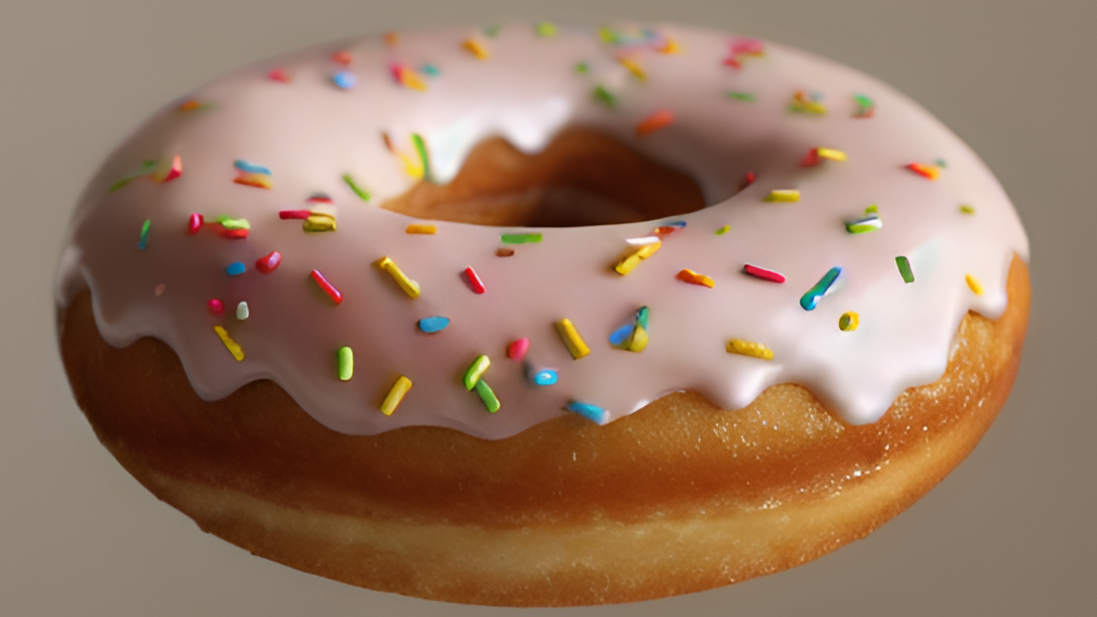
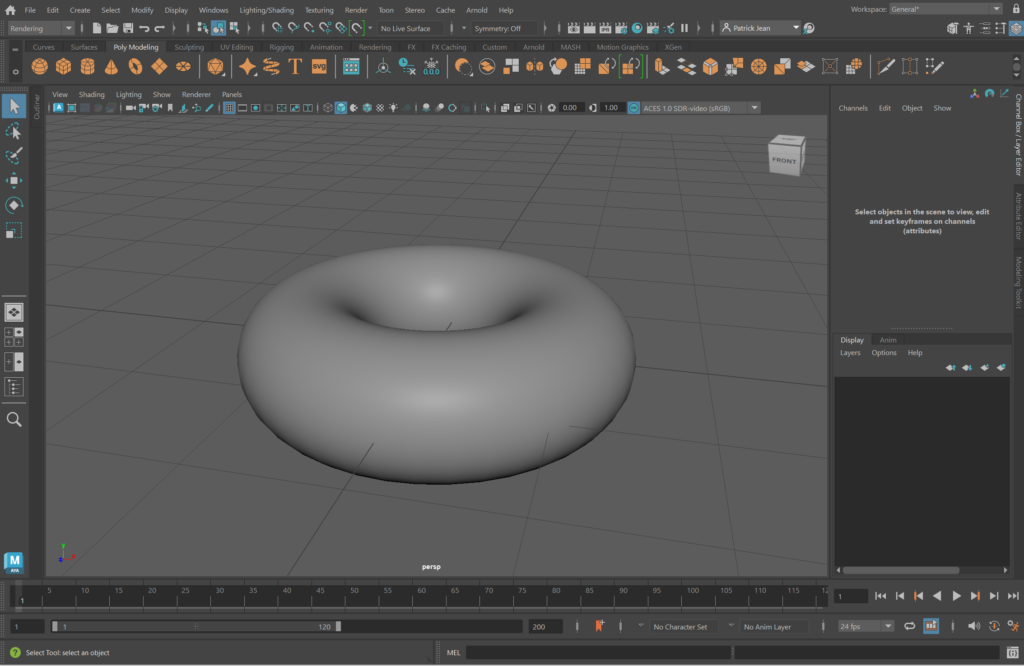
As a simple example, let’s make a delicious donut:

First, create a torus in Maya. Increase the number of divisions to 40.


Now let’s add a cool Stable Diffusion model in the model manager, the amazing: darkstorm2150/Protogen_v5.8_Official_Release


Now that the model is added, let’s set up controlNet. Select controlNet in the drop-down menu. Then, set the resolution to 1920×1080 and the upscaler to RealESRGAN. Finally, select the new controlNet 1.1, depth version, from the controlNetName dropdown menu. Also make sure the inputPass is set to: depth.

Now, place the camera where you want to render and press the auto-depth button in Mandala’s UI panel. It will automatically compute the correct depth values for the current render camera.

Type this prompt : A delicious donut
Hit render
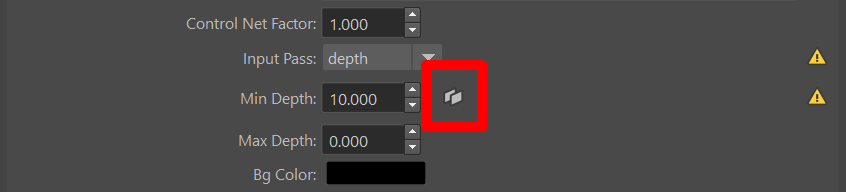
! That’s it! As you can see on the top left, various passes have been rendered. These passes are used as an input by the controlNet. Try clicking on the passes icons to check them out.
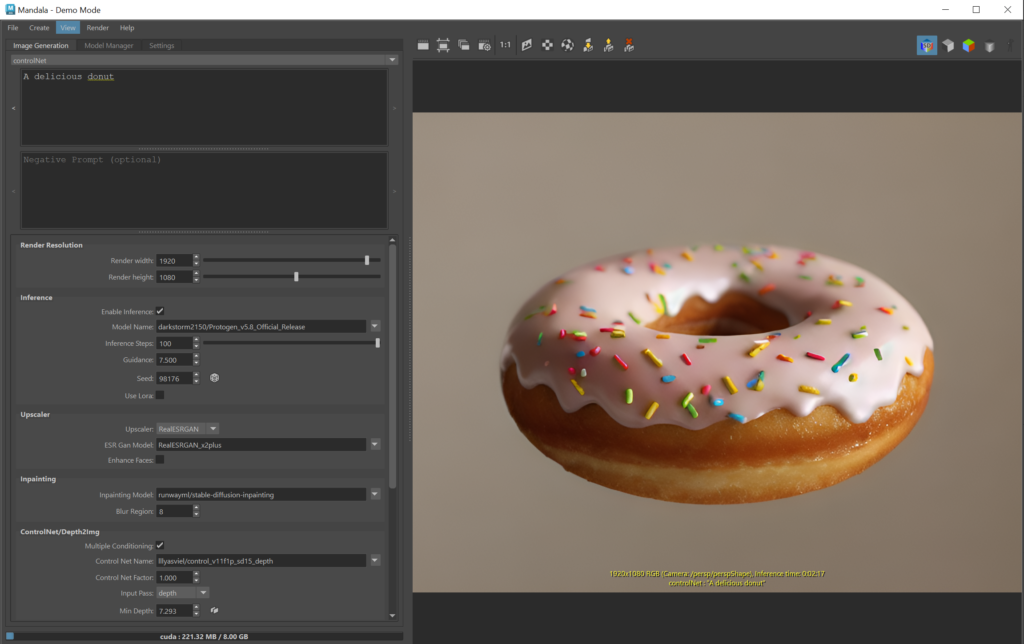

Parameters #

controlNetName: The name of the control net model to use. The model’s training size has to match the main diffusion model above (512 for SD 1.5 and 768 for SD 2.0), or an error will pop up. It will use ‘inputPass’ as input for diffusion, so make sure both are matching.
extraControlNet: Extra controlNet model for multiple conditionning. This will use ‘extraInputPass’ as an input.
controlNetFactor: The outputs of the controlnet are multiplied by this scale before they are added to the residual in the original unet.
inputPass: One of “normals”, “depth”, “canny”, “sobel”, “though”, or openpose. The input pass used by ControlNet. Make sure it matches the model! For example, the ‘normals’ pass should be used with a ‘normals’ controlNet model. If the model and the pass don’t match, results will be unpredictable.
multipleConditioning: If enabled, controlNet will use an extra conditioning input. For instance, you can use Depth + Openpose to condition the diffusion process with two different render passes.
extraInputPass: Same as inputPass, but for the extra controlNet.
extraControlNetFactor: Factor for the extra-controlNet. Using this, you can weight the influence of each pass on the result.
minDepth: The minimum depth when converting the depth data to grayscale. You can compute these automatically using the ‘auto-depth’ button in the UI. Note that the algorithm will take the camera frustum into account and only calculate depth based on the visible mesh points!
maxDepth: The maximum depth when converting the depth data to grayscale. You can compute these automatically using ‘auto-depth’ in the UI.
jointRadius: The radius of the joints when drawing the skeleton, use with controlNet/openpose
jointOpacity: The opacity of the joints when drawing the skeleton, use with controlNet/openpose.
cannyThreshold1, cannyThreshold2: The first and second thresholds for the Canny edge detector.
sobelKernelSize: The size of the Sobel kernel, use with sobel/canny/hough
houghRho, houghTheta, …: Parameters for the Hough line detector.

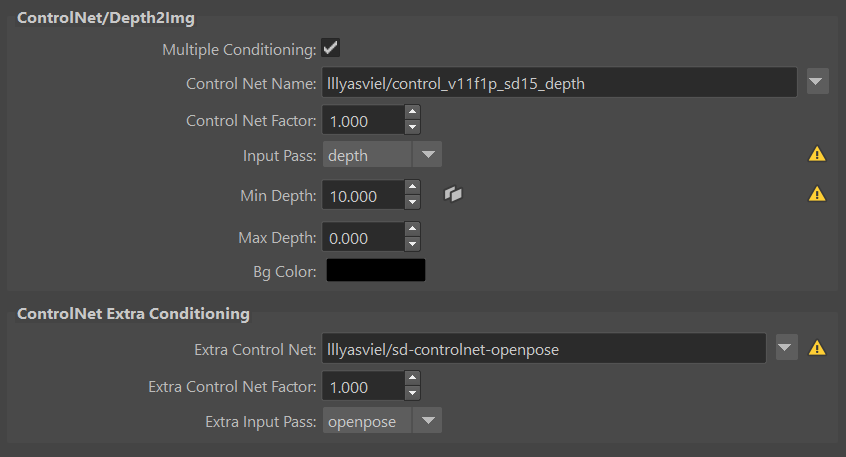
For the other parameters, refer to the diffusion page.

What are your Feelings
Share This Article :
  • Facebook
  • X
  • LinkedIn
  • Pinterest
Table of Contents
  • Example
  • Parameters
© 2025 . Created for free using WordPress and Colibri
  • Front Page
  • Mandala
  • Kami
  • Downloads
  • Support
  • Privacy Policy