
Generates panorama images. The settings are the same as in the diffusion model. This mode can generate larger images though. It works best on wide frame formats (like 2048×512).
![]() The scheduler MUST be set to DDIMScheduler for it to work!
The scheduler MUST be set to DDIMScheduler for it to work!
Example #
 Got to the model manager and click on Add Model From URL. Type in this model id: Got to the model manager and click on Add Model From URL. Type in this model id: prompthero/openjourney 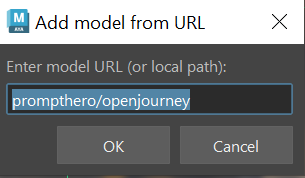 |
Now in the image generation tab, set the mode to panorama, the resulting to 2048×1024, and the upscaler to RealESRGAN with a 2x model. In the prompt editor, paste this:mdjrny-v4 style 360 degree equirectangular panorama photograph, Alps, giant mountains, meadows, rivers, rolling hills, trending on artstation, cinematic composition, beautiful lighting, hyper detailed, 8 k, photo, photography |
Now before you render, we need to change the scheduler to DDIMScheduler. Otherwise, an error will pop up. (NB: This will be fixed in the next version). Also make sure VAE Tiling and Slicing are checked. |
Hit  render. After a while, an image appears. render. After a while, an image appears.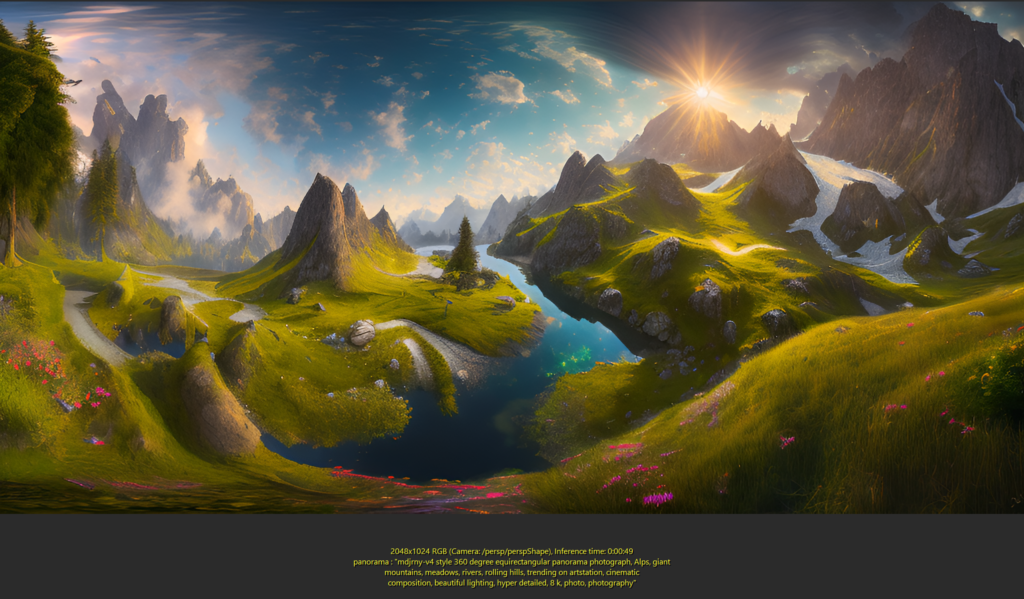 |
Optionally, try applying the image to a shader and assign it on a sphere. Create a sphere, then click on the  create texture icon. After reversing the sphere’s normals and playing with UVs a little bit: create texture icon. After reversing the sphere’s normals and playing with UVs a little bit: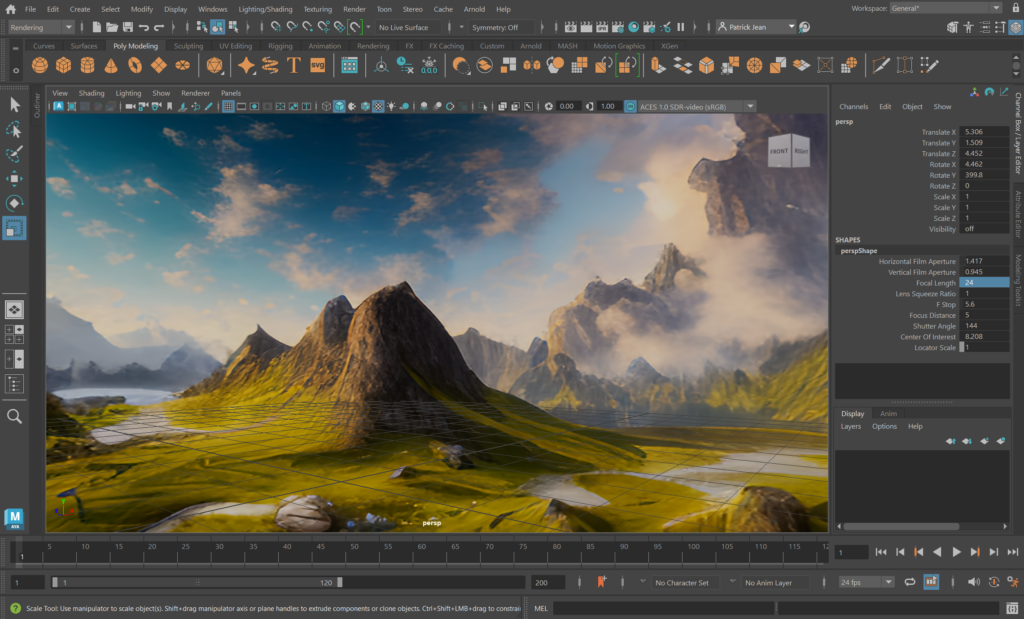 |
Parameters #
Everything is similar to the “diffusion” mode.


